Accepting an Azimuth point

So, somebody has offered you an urbit; how do you accept it?
If you aren’t familiar with managing Ethereum tokens, this might seem a bit confusing. I promise it’s pretty easy, but does require a short walkthrough if you are not experienced with managing crypto tokens. I will try to be as clear as possible in my instructions without getting lost in the technical weeds.
Note that this process is not necessary should you opt for hosted services, or should you decide to run a comet. If you’ve never used Urbit before, you should boot a comet first! Note also that this process requires you to pay several ethereum transaction fees to interact with the contracts that record ownership, which you should expect to cost ~10-20USD as of late 2020. However, this should only take you a couple of minutes, and you only have to do it once.
First, a little glossary:
Urbitcan refer both to the overall software project, or an individual instance of its operating system (more properly called a ‘ship’). See here for a more detailed description of the projectAzimuthis Urbit’s PKI on Ethereum – in short, it’s a decentralized database of who owns what, represented as tokens owned by wallets- An
Azimuth point(AZP) refers to an individual Ethereum token on Azimuth, representing ownership of an address on Urbit’s networkBridgeis a tool that interacts with the Ethereum blockchain, which you can use to manage and modify ownership of your ship
A brief summary of what this guide will tell you how to do, so that you can keep it in your head as we proceed: We are going to install the Metamask browser extension, find the wallet address it gives us, pass that on to the person issuing our Azimuth point, and once it is received and confirmed, we will log onto the Urbit Bridge to claim our master ticket – the password that proves ultimate ownership of an Azimuth point. Then we will download a keyfile so that we can boot our ship for the first time. Let’s begin!
Metamask
You will need to install Metamask in the browser of your choice. Metamask is a browser extension that functions as a cryptocurrency wallet, specifically for Ethereum. It’s used in a range of decentralized apps (‘DApps’), but you don’t need to worry about this stuff; the thing to understand is that you will use this piece of software to accept a token and prove that you own it.
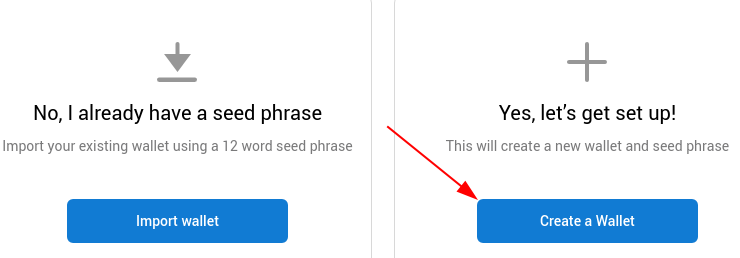
Once you’ve installed the extension in your browser, you’ll be presented with a welcome screen and asked whether you’re creating or importing a wallet. You will select create a wallet.
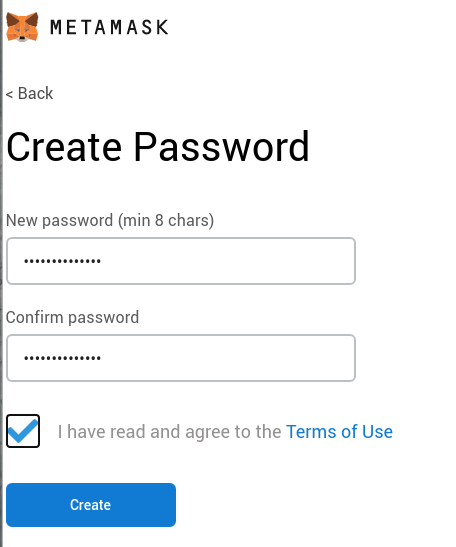
You will then be prompted to create a password. Use a very strong one.
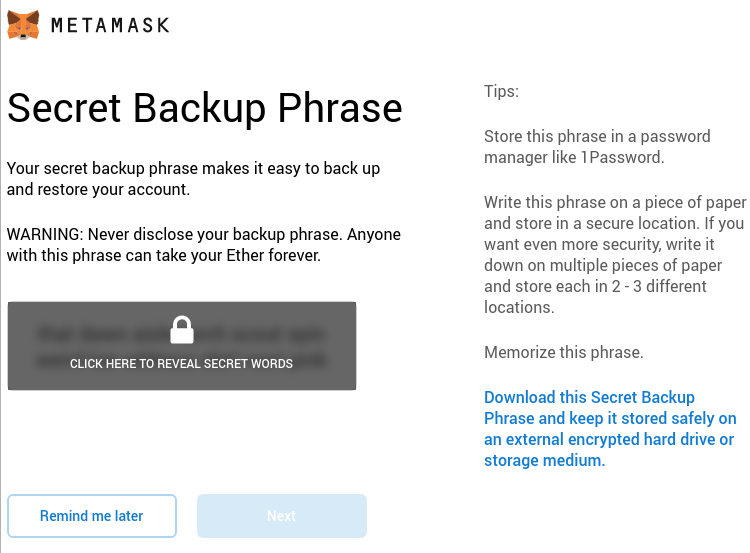
Metamask will then give you a secret backup phrase; write this down somewhere safe. You can use this phrase to recover your wallet if you need to install Metamask on another computer. It is bad practice to keep this saved on your computer – treat it as something precious.
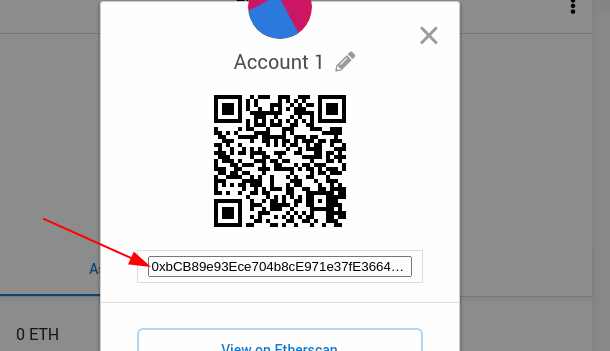
You will then be presented with the main menu for Metamask. Click the menu icon at the top right, then select ‘Account details’:
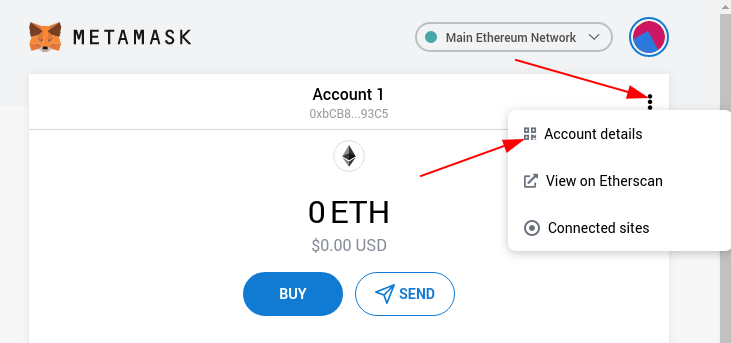
You’ll see a QR code and a text bar with a long alphanumeric string. This string is your wallet address, which will receive your Azimuth point. Copy it and send it to the person that is giving it to you.
You will also need to send funds to this wallet address. Buying or obtaining ETH is outside of the scope of this tutorial, but you probably have a friend who can suggest a way of getting it.
Once the other party has issued the point, you will see a transaction appear underneath the ‘Activity’ navigation header. Click this and keep an eye on it.
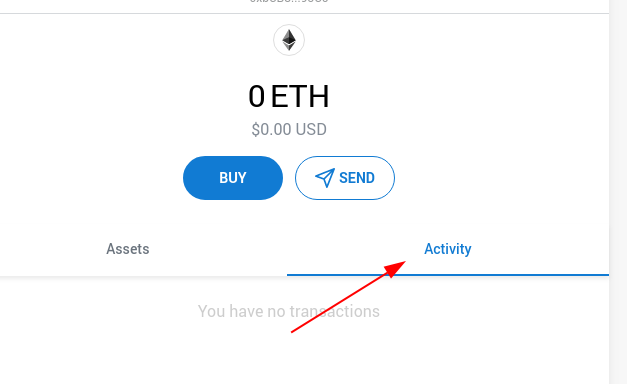
Once your transaction has shown up under Activity, after a few minutes depending on transaction speed, you will see a green block next to it with ‘Confirmed’. This means that the transaction has begun and will belong to you after you have accepted it.
Bridge
Now that you have been sent the token that proves ownership of your ship, you can log into Bridge to accept the point and issue the master ticket you can put in cold storage, and the keyfile you can use to boot the OS.
A note here: this requires ETH gas fees, specifically for receiving the point and transferring it to your master ticket. As of writing (late 2020), this fee can get pretty high; you can wait until gas prices drop to minimize the expense, but don’t be surprised if this costs you an extra 20USD on a bad day. Keep an eye on gas prices and wait for an advantageous time. (High fees are a reason that debate has begun about moving away from Ethereum for the Urbit PKI.)
Go to bridge.urbit.org and click ‘Metamask, Mnemonic, Hardware Wallet…’ at the bottom:
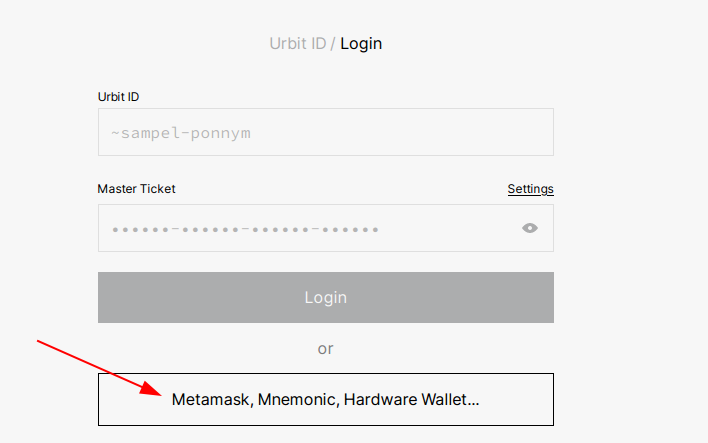
Expand the Metamask menu, and click the button that gives it access to your browser extension, then give it permission when prompted by Metamask. Proceed by clicking ‘Login as 0x….’.
Once you’ve logged into bridge, you will be prompted to accept the transfer of your planet. Click to accept – this will automtically deduct ETH from your Metamask wallet to pay for the transaction.
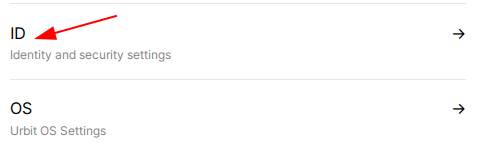
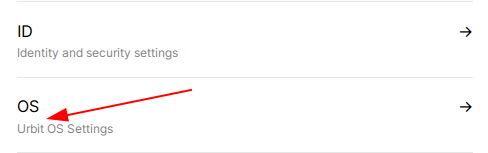
Once you’re on the main Bridge dashboard, you will see a menu with several options for managing your Azimuth point. Click ‘ID’:
Click ‘Transfer to Master Ticket’. Do not click this more than once. This incurs four transaction fees to create sub-wallets with delegated privileges; however, you do not need to pay any more fees after this is finished.
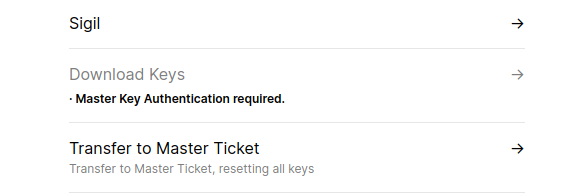
Now click ‘Download Keys’, and click ‘Download passport’. You will be taken to another page that with a download button.

Your paper wallet contains your ship’s master key, a passphrase that proves ultimate ownership in the same way as your Ethereum wallet. You will also be given a few other keys you can use to take actions at lower privilege levels. Print these off for safekeeping and delete the file; treat this as something precious as well.
In the future if you wish to use Bridge, you can use the master key you just downloaded instead of Metamask. I find this preferable to authenticating with Metamask.
Now we will proceed to download your Arvo keyfile so that you can boot your ship for the first time. Go back to the main menu in Bridge and click ‘OS’:
Click the ‘Download Arvo Keyfile button’.
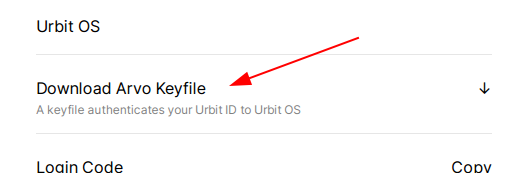
You will be given a file named ‘[ship-name]-1.key’ – you will use this to boot your ship for the first time, but only the first time.
Congrats on making it to the end! You now have an urbit and the keys to boot and manage it. You’re ready.
Instead of writing the installation instructions out, I advise you to proceed to the official instructions provided by Tlon.
This post is also available on Urbit, where you can post comments. Join ~matwet/networked-subject and open the Networked Subject notebook. Boot a free comet or Buy a planet with Bitcoin .
.