Configuring your Urbit Bitcoin wallet

Late 2021 Note: This guide is now largely outmoded; %btc-wallet now comes installed out of the box and does not need to be manually installed; the dojo commands have been updated. |
|---|
The day has finally arrived: May 27 saw a major update to Urbit, and the public release of a bitcoin wallet and the ability to send and receive payments. Your ship provides an identity layer on top of bitcoin – you can tell your planet to send money to ~sampel-palnet, and Urbit takes care of the rest. Think CashApp – enter a handle, send money – but you own the whole stack.
Urbit’s implementation derives an xPub address from your ship’s master ticket. An xPub (extended public key) is like a seed to generate new addresses for every transaction – what is called a hierarchical deterministic wallet (HD wallet). Your ship’s master ticket is cryptographic proof of ownership of your address on the network, and is now the seed for all the bitcoin addresses you will generate in the course of transacting. On txop of systemic elegance, this is a great boon to financial privacy – by creating a different address every time you receive funds, it makes it much more difficult for an observer to tell how much money you have or who is sending it to you. By connecting to a node you trust or run yourself, nobody sees a connection between wallet addresses and IP addresses. Urbit takes care of all of this transparently.
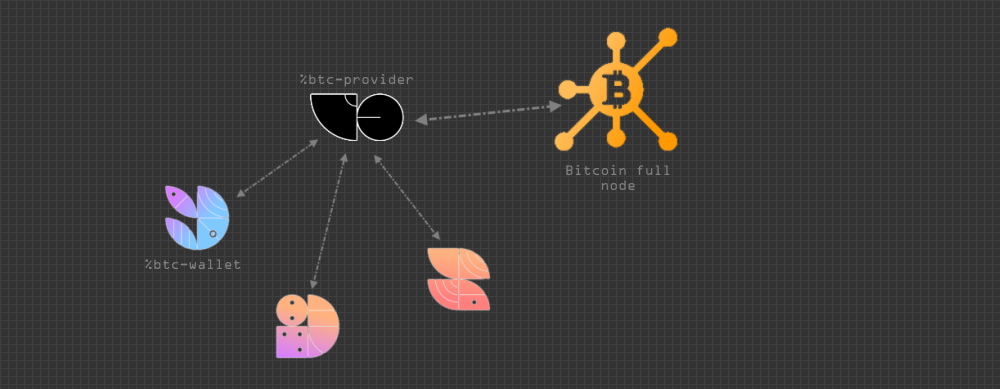
Urbit’s bitcoin implementation is pretty straightforward to understand. A provider runs a full node with a specific stack of bitcoin software. The provider then configures %btc-provider on a ship to relay information to and from the full node. Normal pilots run %btc-wallet on their ships, and point the wallet at the provider’s ship. Your ship’s wallet talks to your provider, and your provider talks to the full node.
This tutorial has two halves – connecting a ship to a provider, and connecting your provider to an operational full node. If you do not already have an Electrs full node stack set up, see the previous bitcoin tutorial for instructions. If you are just trying to connect your wallet to an existing provider, you can skip the second section.
Connecting a ship to a provider
If you just want to connect your ship to somebody’s provider, the process is very simple.
![]()
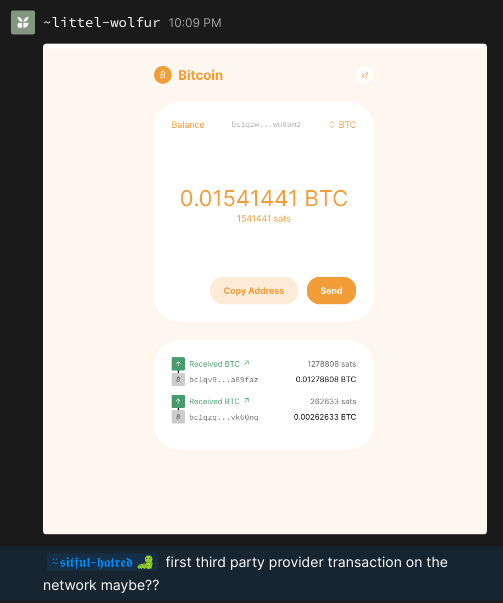
A bright orange bitcoin tile is available in your system menu – click on it, and enter the @p of your provider.
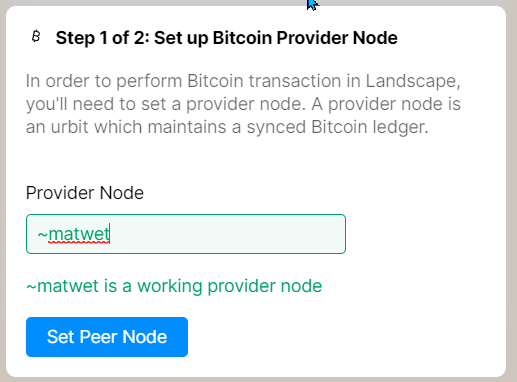
This means it’s working 🙂
You will be prompted for your master ticket (you only have to set this up one time). Your master ticket will allow you to derive your xPub key.
If you do not have a master ticket, for instance if your ship is on a hardware wallet, you can bypass this option and provide an xPub from an existing wallet (instructions for Trezor, Ledger – note that some people have experienced issues with importing external xPubs).
Paste in your xPub key and proceed. Once you can see your balance, you’re good to go! You now have a bitcoin wallet on your ship. You can send money to other ships without knowing anything about their wallet addresses, and you will automatically create a new address for every transaction you receive.
If you need to change your provider from the dojo, you can use this one-liner syntax (thanks ~silnem!):
- ~sampel-palnet:dojo> :btc-wallet|command [%set-provider [~ ~sampel]]
Connecting a provider to a full node
Before you start, make sure TCP port 50002 ingress is allowed for your node – disable any firewall for that port, and set up port forwarding if your node is on a home network and remote from your provider ship. Once your full node is stood up, synced and connectable, you can connect your provider to it from the dojo. For these commands, replace ~sampel with your provider ship’s @p.
- ~sampel-palnet:dojo> =provider ~sampel
- ~sampel-palnet:dojo> =network %main
- ~sampel-palnet:dojo> |rein %bitcoin [& %btc-provider]
- ~sampel-palnet:dojo> :btc-provider +bitcoin!btc-provider/command [%set-credentials api-url='http://addresshere' network]
Return to ~sampel’s Landscape and click the Bitcoin tile to enter your new provider.
Let’s test it – click the tile and enter the provider’s @p. Follow the instructions in the previous section to get your xPub address from Bridge or another wallet.
If you want to whitelist your ship’s %kids (ie planets your star has spawned or your moons), enter:
- ~sampel-palnet:dojo> :btc-provider +bitcoin!btc-provider/command [%add-whitelist %kids ~]
To whitelist a specific ship, enter:
- ~sampel-palnet:dojo> :btc-provider +bitcoin!btc-provider/command [%add-whitelist [%users users=(sy ~[~wallet-hodler])]]
…replacing ~wallet-hodler with another @p.
To whitelist all members of a group, enter:
- ~sampel-palnet:dojo> :btc-provider +bitcoin!btc-provider/command [%add-whitelist [%groups groups=(sy ~[[~sampel %group-name]])]]
…replacing %group-name as well as the host ship.
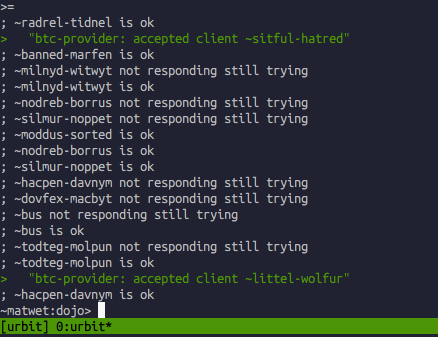
Once a whitelisted client adds you as a provider, it is printed in the dojo:
By the way, I have to brag – I am pretty sure I set up the first operational provider on the livenet, and facilitated its first transaction; a few weeks in February well-spent!
This post is also available on Urbit, where you can post comments. Join ~matwet/networked-subject and open the Networked Subject notebook. Boot a free comet or Buy a planet with Bitcoin .
.