Urbit, Nginx and Letsencrypt

As part of a project to document how I use Urbit and the things I learn along the way, I’m going to document the process of setting up this site. In its current state, it’s pretty simple – a static site using a modified template (Hugo and Hermit), served from a Digital Ocean Ubuntu VPS (referral link).
Behind the scenes, there are a couple of extra features – I wanted to be able to access my planet as a subdomain over SSL (proxied from my home PC), and I wanted to run ~matwet under the hood on the same VPS, also accessible on a subdomain.
This is actually pretty easy to do! Nginx can be configured to proxy content from a different port through a subdomain, or even from a different server entirely.
So, to recap, in this guide we will:
-
Set up a VPS and point a domain at it
-
Set up our Urbit
-
Install and Configure Nginx to point at both our Urbit and a blog (or whatever)
-
Secure the site with Letsencrypt
An important caveat is that this is none of this is necessary if you just want to run your urbit. You can download it and run it on your home PC (even on Windows!). It’s not even necessary if you want to access your planet through an easy-to-remember domain; you can simply use built-in DNS proxying. This intended for anyone else who just wants to do it themselves for the fun of it, or wants to keep their Urbit running 24/7 in a high reliability data center. At the end of this, you’ll have an alien spacecraft running on a remote server, and learn three ways to configure an nginx web server.
One more important note before we begin – your urbit instance (“ship”) is portable, meaning you can shut it down and move it to any device that can run urbit. In the course of moving an existing ship to your server, or if you ever decide to move your ship to another server or your PC, you can simply download the directory that contains your data (your “pier”) to the desired device. Make sure you shut down ship before you do so! Trying to run your ship twice in different places will probably de-sync it from the network and require a personal breach. You can stop your urbit at any time from the command line by pressing ctrl-d, or force it to quit with ctrl-z.
Jan 2021 Edit: Be sure to check out ~dovsem-bornyl’s similar guide for alternative step-by-step instructions, including VPS & domain setup!
May 2021 Edit: I now recommend using Caddy instead of Nginx – this tutorial is still perfectly serviceable, but configuring Caddy is much much simpler. You can see the (much shorter) tutorial here.
Server setup
You will first need to spin up a VPS. As I mentioned, I use Digital Ocean, but hosts are commodity providers and are generally fungible if you’re not doing anything too fancy or critical.
Selecting a plan
Urbit checks to make sure there is 2GB of memory available on the system when you start it up, but it rarely uses anywhere close to that limit, and you can create a swap file to spoof it if you have less than the requirement. That said, I would recommend a VPS with at least 2GB for a noticable improvement in performance. Ship performance does noticeably scale with resource availability, so it may be worth it to you to bump your specs to a higher tier plan – but the cheapest tier is useable, and you can always do that later.
Domain names
Next, we’ll assign a domain name to our server. Once you’ve found a name you like, purchase it, and point it at the appropriate nameservers, then add the domain to your droplet.
Remember that DNS can take time to propagate – you see people say that it can take up to a day, and the longest I’ve waited was about 8 hours, but typically it will propagate within about an hour. Go make some coffee.
Server configuration
Once you’ve created your server, you will need to log into into it with an SSH client. If you’re using Linux or MacOS, you can just use the system terminal; if you’re using Windows, the classic standby is PuTTY, but the new Windows Terminal is pretty slick.
Now, SSH in using your credentials:
- $> ssh user@your.server.ip.addr
You will be dropped into a terminal that will walk you through creating an account. You can find detailed instructions on setting up your server with a new user account here. I would strongly recommend setting up SSH authentication as outlined near the end of those instructions.
Once everything is set up, we need to get a few things installed.
Installing software
There’s nothing too special here! We just want to put nginx and certbot in place.
- $> sudo apt update
- $> sudo apt install nginx certbot python3-certbot-nginx tmux
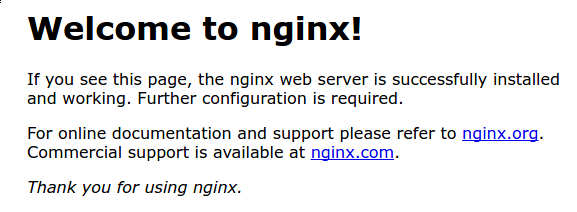
Once it’s completed, nginx should have started running – try navigating to the IP address of your server in your web browser, it should present you with this:
Setting up a server block
We need to configure nginx for our new domain and the blog it hosts. First, we’ll make the folders that contain its data and assign the appropriate permissions (with your domain substituted, of course), then add a placeholder index.
- $> sudo mkdir -p /var/www/your.domain/html
- $> sudo chown -R $USER:$USER /var/www/your.domain/html
- $> sudo chmod -R 755 /var/www/your.domain
- $> echo "placeholder" > /var/www/your.domain/html/index.html
Then we’ll add it to nginx’s sites-available by copying the default configuration, then opening it in an editor:
- $> sudo cp /etc/nginx/sites-available/default /etc/nginx/sites-available/your.domain
- $> sudo nano /etc/nginx/sites-available/your.domain
You can ignore the commented-out lines for now – just go through it and replace default_server with your domain, edit the root path variable to point at our new directory at /var/www/your.domain/html, and change…
server_name _;
to…
server_name your.domain www.your.domain;
…then press ctrl-o return, ctrl-x return to save and exit.
We also want to make sure we didn’t make any mistakes before we set this into gear, so we’ll run a little test:
- $> sudo nginx -t
It should report no errors, but will point you at them if you have.
Finally, let’s link our new config to sites-available to tell nginx that it’s ready for use!
- $> sudo ln -s /etc/nginx/sites-available/your.domain /etc/nginx/sites-enabled
- $> sudo service nginx restart
If you’ve done everything correctly, and your DNS update has had time to propagate, you should be able to point to your domain in your browser and pull up the word ‘placeholder’.
Now you can throw your locally-generated static site onto your server (the creation of which is slightly beyond the bounds of this document!). From your local computer, copy your desired content into the path for your newly configured site:
- $> rsync -avz /path/to/content user@your.domain:/var/www/your.domain/html
Once it’s copied, try refreshing the browser window with your domain pulled up. Viola! You have completed the most treacherous part, and you have a fancy new blog.
Installing Urbit
Now that we have a web server up and running, let’s put an urbit ship on the same machine. This will probably take a little bit of time if you’ve never done so before, but should only take a couple of minutes if you’re familiar with the process. If you’re new to urbit, and don’t have a planet yet, go ahead and follow the instructions for booting a comet. Comets are free and infinite, but can take a little bit of time to boot up for the first time.
A useful tip before you begin is to launch urbit inside a tmux session. Tmux is a tool that allows you to create multiple terminal sessions, and ‘attach’ or detach from them at will – this means your urbit can hog the entire terminal screen, and you can still switch back to a normal command line to perform operations on your server.
SSH back into your server, and launch a new terminal session named ‘urbit’ like this:
- $> tmux new -s urbit
Your command line’s history will suddenly clear from the screen, because you’re in a new one. Now you can follow the instructions on this page. If you need to detach from your urbit session, simply press ctrl-b d and it will disappear. If you need to re-attach to it, simply run:
- $> tmux a -t urbit
And you will suddenly see your urbit shell again, chugging away.
After your urbit has booted up fully (which again will probably take at least 5 minutes the first time you do it, and up to an hour if you launched a comet), look for a few lines that look like this:
- ames: on localhost, UDP 31337.
- http: web interface live on http://localhost:80
- http: loopback live on http://localhost:12321
- ~sampel-palnet:dojo>
The bit we’re interested in is that second line, that tells you the web interface port. If you’re already running something (like nginx) on port 80, or if the urbit binary doesn’t have the appopriate permissions, it will default to port 8080, and increment up from there if it finds that port occupied.
If you navigate to http://your.domain:8080, you should be presented with a login screen for an urbit ship! Go back to your urbit command line, type +code and hit return to get your password.
So we’ve set up a domain that servers a blog by default, and an urbit over port 8080. Pretty fancy! But we’re not done here – URL aesthetics demand that you get rid of that ugly tailing port and give your ship a nice subdomain.
Configuring a local reverse proxy subdomain
A reverse proxy is a server configuration option we will use to point a subdomain at the port our urbit is running on – so instead of your.domain:8080, you can go to ship.your.domain, and we can secure it with SSL a couple of sections down.
This actually is not terribly difficult! We just need to create an A record and modify our existing sites-enabled to tell the server how to respond to requests for a subdomain.
First, you will need to log into your DigitalOcean dashboard and navigate to your droplet. You should see a header titled ‘Domains’, and a box that contains the domain you are using. Click on your domain, and you will be presented with a page titled ‘Create new record’ – ‘A’ should be selected by default, and that is what we want.
Simply fill out the ‘hostname’ box with your desired subdomain (just the subdomain, without your.domain), select your domain under ‘will direct to’, and press ‘create record’. This should go into effect more or less immediately. (While you’re here, you may want to create a www. subdomain if you don’t have one).
There are more verbose instructions with pictures here.
Now we’ll modify our site configuration:
- $> sudo nano /etc/nginx/sites-available/your.domain
Scroll down to the very bottom of the file and insert the following, after replacing sub.your.domain with your desired subdomain:
server {
	server_name sub.your.domain;
	location / {
		proxy_set_header Host $host;
		proxy_set_header Connection '';
		proxy_http_version 1.1;
		proxy_pass http://127.0.0.1:8080;
		chunked_transfer_encoding off;
		proxy_buffering off;
		proxy_cache off;
		proxy_redirect default;
		proxy_set_header Forwarded for=$remote_addr;
	}
}
This is a proxy setup optimized for EventSource; there is one important thing to note in it – proxy_buffering off;. This is something you will specifically need to set for Landscape to work at all; otherwise, the interface does not load properly, and you will be met with a blank screen after logging in. Be sure to enable this option on any nginx configuration that is set up to proxy for urbit.
Now verify the syntax of your edits:
- $> sudo nginx -t
Once you save this file and exit, reload nginx and test your new subdomain in a web browser:
- $> sudo service nginx restart
Proxying from a remote server
I mentioned before that I also wanted to proxy a ship from a remote server – in this case, my home PC. So, when I navigate to sitful-hatred.subject.network, it simply proxies the traffic from my home computer. This is much easier than remembering my home IP address – though I will have to update my configuration the next time my IP changes. If you run a VPS and want to proxy a ship running at home or anywhere else through it, you can easily do the same.
Follow the instructions in the previous section to create a new A record for your subdomain, and open your sites-available file in a text editor once more.
- $> sudo nano /etc/nginx/sites-available/your.domain
Scroll down once more to the very bottom and add the following, substituting your IP address and the port number your urbit is serving from:
server {
	server_name your-planet.your.domain;
	location / {
			proxy_set_header Host $host;
			proxy_set_header Connection '';
			proxy_http_version 1.1;
			proxy_pass http://your.remote.ip.addr:80;
			chunked_transfer_encoding off;
			proxy_buffering off;
			proxy_cache off;
			proxy_redirect default;
			proxy_set_header Forwarded for=$remote_addr;
	}
}
Hit save and exit (ctrl-o ctrl-x), and verify the syntax like this:
- $> sudo nginx -t
If you’re good to go, then reload nginx.
- $> sudo service nginx restart
Pretty easy! Between these two ways of proxying your urbit, I’m sure you can think of an interesting configuration for yourself. But we’re not done here yet; we need to add a little lock icon to our URL bar.
Certbot
This is probably the easiest part of this tutorial, to the credit of the LetsEncrypt devs. You already installed the necessary software at the beginning of this tutorial, so now simply run:
- $> sudo certbot
and proceed through, selecting the default optinons. Once it’s completed, you should be presented with a success message, and should also be able to pull up your site and all its subdomains with https://!
One last thing to do is automate certificate renewal so you don’t have to log into your VPS every three months to manually do it.
- $> sudo systemctl enable certbot.timer
- $> sudo systemctl start certbot.timer
And we’re finished! A handy little server that conveniently demonstrates different ways to proxy our urbit ship. This probably was a little less specific than it could have been in places, but if you have any questions, feel free to reach out to me on the network at ~sitful-hatred.
An addendum here; you may have noticed that the connection between my browser and VPS is encrypted, but that the connection between my home PC urbit and VPS is not. I noticed this too, and I don’t intend to keep it that way forever. Setting up a self-signed encrypted connection between my home PC and my VPS is on the list of weekend projects, and whenever I get it figured out I will update this post!
Edit: The way i eventually addressed this was by running Caddy on my home PC directly, and pointing the subdomain at my home IP. Caddy makes TLS and reverse proxies significantly simpler than these instructions, check it out!
This post is also available on Urbit, where you can post comments. Join ~matwet/networked-subject and open the Networked Subject notebook. Boot a free comet or Buy a planet with Bitcoin .
.