Urbit on Windows with WSL2

| Late 2021 Note: This guide is now largely outmoded; Urbit now has official Windows binaries, and Port now has a native Windows installer |
|---|
If you’re curious about Urbit but don’t know anything about running Linux binaries or don’t have a Mac, you don’t need to feel left out in the cold; Urbit runs just fine in WSL2 on Windows 10.
This tutorial will guide you through each step necessary to set up WSL and get an Urbit comet up and running. You don’t need to buy an address or learn any bash, you can just follow these directions and copy-paste the terminal commands.
Once you have Urbit installed for the first time, it requires very little effort to get it running. This process will take a bit of time, but once you’re set up you can control your comet in your web browser.
You will need to get WSL2 and Ubuntu 18.04 set up, then install Urbit. WSL is Microsoft’s official project to allow users to run a Linux operating system ‘inside’ of Windows. Note that it is necessary to use WSL2. WSL2 virtualizes the operating system on the processor like VirtualBox, meaning you will be running a full instance of your Ubuntu off to the side of your Windows instance.
2021 update: An easier method for running Urbit on Windows with Docker Desktop is documented here. You will still need to follow the directions in this tutorial to install WSL2 if you don’t already have it enabled.
Updating
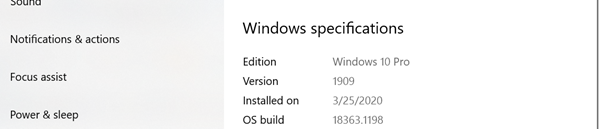
First, you will need to update your Windows 10 installation to at least version 1903 build 18917. You can check your Windows version by opening Settings > About:
If your version is too low, you will need to update. Head here and use Microsoft’s installer:
https://www.microsoft.com/en-us/software-download/windows10
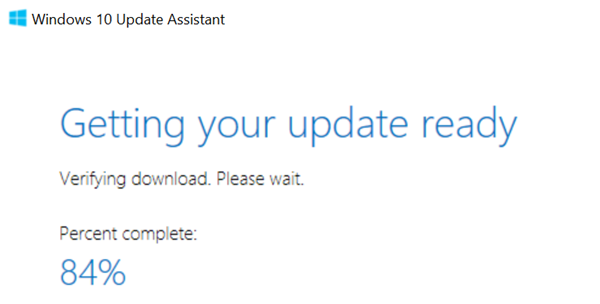
This may take a while, up to a few hours.
Enabling WSL
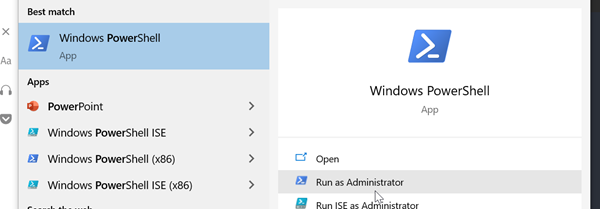
Once your update has completed, launch PowerShell. You can click the start button and start typing ‘powershell’; be sure to run it as an administrator.
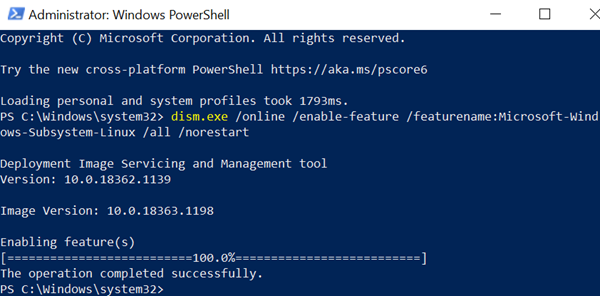
Right click on the PowerShell window to paste this into it, and press enter it to enable WSL1:
- PS C:\> dism.exe /online /enable-feature /featurename:Microsoft-Windows-Subsystem-Linux /all /norestart
Now paste this command into PowerShell to enable virtualization (necessary for WSL2):
- PS C:\> dism.exe /online /enable-feature /featurename:VirtualMachinePlatform /all /norestart
Now you must restart your computer.
When you’re back up, install this WSL update:
https://wslstorestorage.blob.core.windows.net/wslblob/wsl_update_x64.msi
Once this installation is complete, your computer is able to run WSL2.
Installation
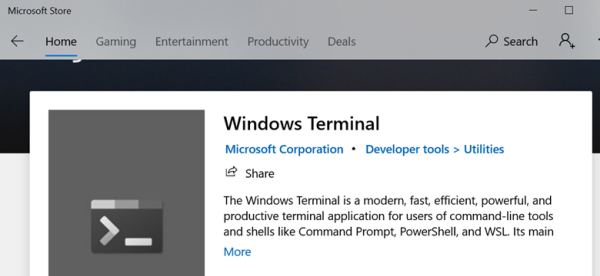
We will go ahead with one bonus option – Windows Terminal. If you’ve spent much time with the Windows command line, you probably don’t have very fond feelings about it. Fortunately, Microsoft has taken a few steps forward in this domain. Installing Windows Terminal is not necessary, but I prefer it.
Open the Microsoft Store and search for windows terminal:
Go ahead and install it; you can ignore and close the prompts to log in.
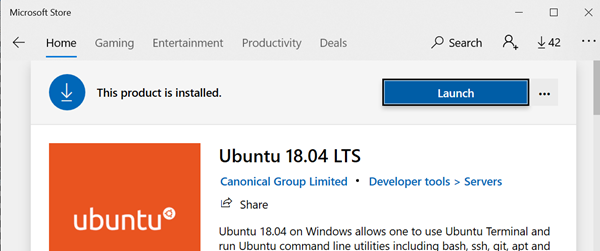
Now search for ubuntu 18.04 in the Windows store and install:
Running WSL2
Once Ubuntu has completed installing, click the Launch button and enter a new username and password for your installation.
Now close it, open your admin PowerShell prompt again, and enter the following:
- PS C:\> wsl --set-version Ubuntu-18.04 2
If your WSL install wasn’t already set to WSL2, it will be now (an issue I ran into). This is necessary for Urbit to work correctly. Make sure to follow this step!
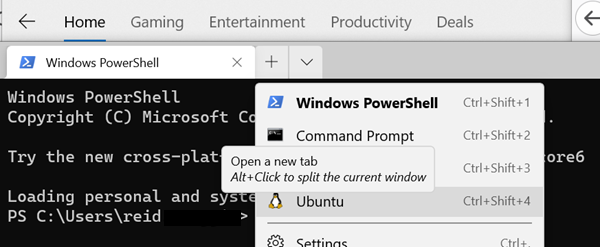
If you open the installed Ubuntu shortcut directly, it will open in a normal command prompt, but you can also open WSL2 in Windows Terminal. Click the drop-down arrow to select your new Ubuntu VM:
Create a user and password if prompted, then run this to update the software:
- $> sudo apt update && sudo apt upgrade
(Note for novices – the $> indicates that this is inside a command line, you do not need to enter those characters.)
Once this process has finished running, you now have a fully virtualized and up-to-date Linux computer running inside Windows!
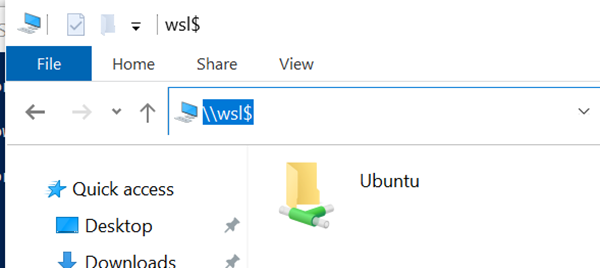
In the command line you will be dropped into your Windows C:\Users\ profile folder by default; for simplicity, use cd to navigate to your home folder in the command line. You can also access your Ubuntu filesystem in explorer by navigating to \\wsl$ – Windows sees it as a network share.
Now all that’s left is to install Urbit, a simple process thanks to its static binaries.
Urbit
Paste the following commands into your terminal:
- $> mkdir urbit
- $> cd urbit
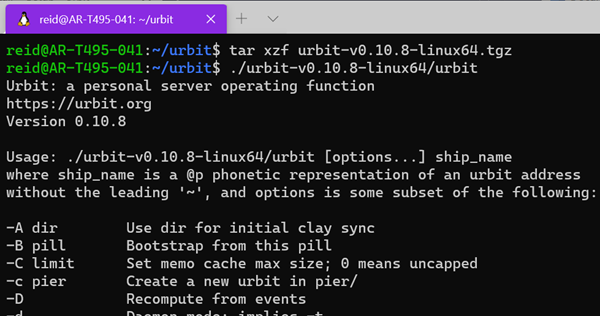
- $> wget --content-disposition https://urbit.org/install/linux64/latest
- $> tar zxvf ./linux64.tgz --strip=1
- $> ./urbit
(Translating the above into english: 1. make a folder called urbit, 2. enter the folder, 3. download the urbit zip, 4. unzip it, 5. run it)
If everything has been successful, you will see the Urbit help menu printed:
Success! To launch a fresh comet, enter the following command:
- $> ./urbit -c mycomet
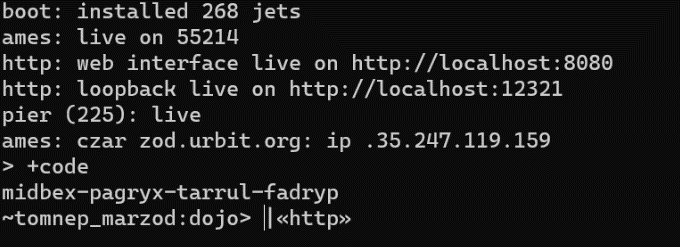
Booting a comet for the first time takes a few minutes, because you have to ‘mine’ an identity. This can take up to an hour, but in my experience is typically more like a few minutes. After an identity is mined, your comet will also need to download and compile its source code. Expect this process to take ~15 minutes total, but don’t be alarmed if it takes longer. Subsequent boots with your comet do not require either step and should only take a few seconds.
Once the compile messages have settled down, you’ll see a message that probably says web interface live on http://localhost:8080 – the port at the end may be different, but make of the address it gives you. You can visit this address in your web browser.
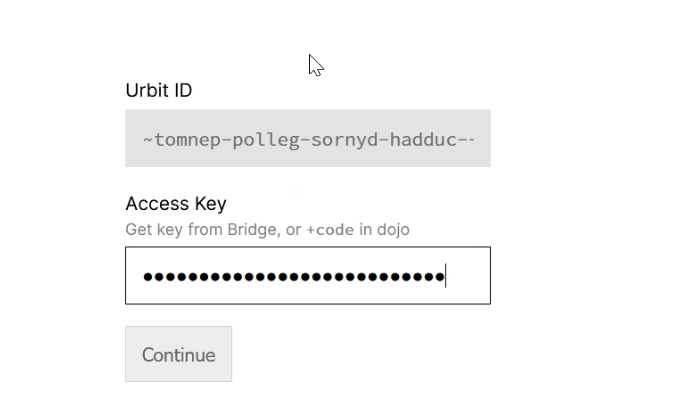
Now type +code in your urbit’s command line – it will present you with four hyphenated six-letter words. This is the passcode for your web interface.
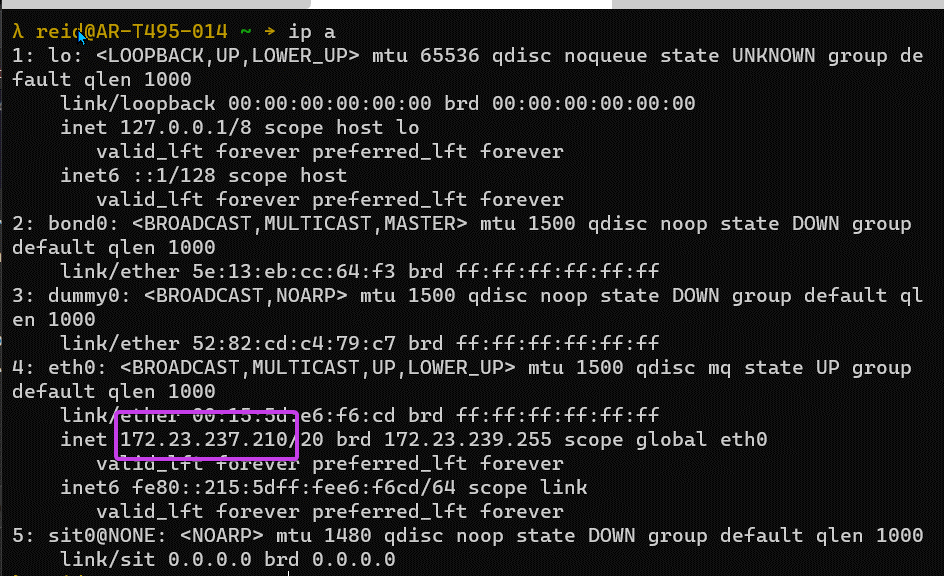
Open your web browser and enter the address that was printed in the console; if you are not able to access your ship at localhost or 127.0.0.1, go back to your Linux terminal (not your urbit’s dojo) and enter ip a – it should give you an IP address that you can use to access your Ubuntu instance’s network interface:
Once you’ve loaded the web UI in your browser, enter the password that you were given by +code.
Welcome to your first urbit!
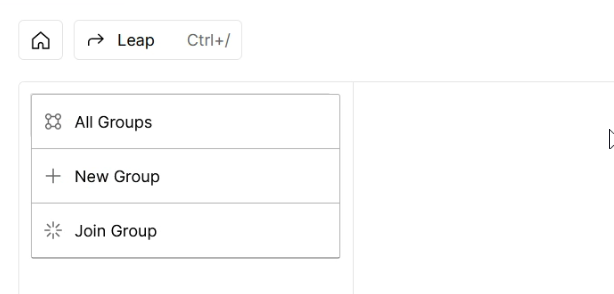
Click the first big square to go to your channel list; you can click the top bar to join groups. Feel free to hop into ~bitbet-bolbel/urbit-community and ~matwet/networked-subject if you want to chat!
Booting a planet
If you’re ready to boot a planet, you can purchase one from one of these providers, or perhaps receive one from a friend. Note that you will almost definitely need to pay with ETH or BTC if you purchase one.
To receive your planet, you can follow these directions. Proceed through the instructions to download your keyfile, and return to this page.
Now for the Windows-specific instructions: once you’ve gotten as far as downloading your keyfile from Bridge, it will likely have downloaded to your Windows ‘Downloads’ folder or similar. In order to access it easily, let’s copy it into our WSL home directory.
Copy your keyfile, and navigate to this location with Explorer, replacing ‘username’ with whatever name you gave your account in WSL:
\\wsl$\Ubuntu\home\username\
Paste the keyfile, and open your WSL command line again. Navigate to your home folder with cd.
Now, for launch – run the following command, modified with the name of your keyfile/planet:
- $> ./urbit/urbit -w sampel-palnet -k ~/sampel-palnet-1.key
If you’ve pointed the command at the correct location for the binary, your planet should boot! If you ever want to move your planet off of this computer, you can simply upload the folder that was just created in your home directory to another computer.
Once your urbit has booted successfully, you can delete the keyfile. You do not need it after the first launch. To boot your ship in the future, just navigate to your home directory and run the urbit binary pointed at your pier:
- $> ./urbit/urbit sampel-palnet
Troubleshooting & misc
- Full official documentation for basic use of your ship can be found here.
- If you want to turn off your urbit, open your command line and press
ctrl-d(orctrl-zto force quit).
- In the future, if you want to restart your urbit but don’t know which steps to follow, you can just enter these commands in your Ubuntu terminal:
- $> cd ~/urbit
- $> ./urbit ~/mycomet
-
- $> cd ~/urbit
- $> ./urbit ~/mycomet
- If your urbit command line is filled with lines that say
loom: clear timer failed Invalid argumentand you can’t load the browser interface after logging in, it’s because you are using WSL1 instead of 2. Scroll back up and repeat the instructions to enable WSL2. You may need to delete and recreate your comet.
The best place for support off the network is the official Discord server. Feel free to reach out to me on Twitter if you’re having any trouble as well – I can’t guarantee timely support, but I am happy to help if I can.
You can even cloud host your ship for free, with Oracle Cloud VM’s free tier. If you want instructions for setting up a server via SSH, you can do so via this tutorial. This is a great next step!
This post is also available on Urbit, where you can post comments. Join ~matwet/networked-subject and open the Networked Subject notebook. Boot a free comet or Buy a planet with Bitcoin .
.